
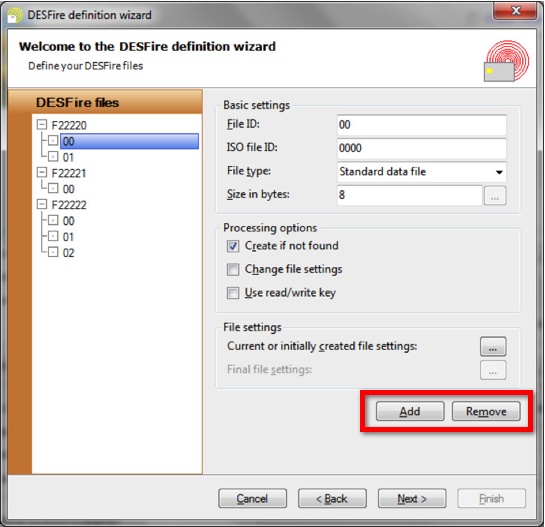
On this page of the wizard you will define for each application which file should be created, read and/or written. They can be added and removed with the Add and Remove buttons, as indicated with the red rectangle, and are characterized by a File ID (a one-byte hexadecimal value) and optionally an ISO File ID (a two-byte hexadecimal value, EV1 only).
CardExchange supports two file types:
•Standard data files, which contain an arbitrary amount of bytes in an arbitrary format, and
•Value files, which contain a four-byte integer value.
Currently, value files are only supported for OmniKey encoders, but that might change in the future.
The length of a standard data file must be specified (Size in bytes). The length of a value file is always four, but for a value file, other settings are configurable by clicking on the  button.
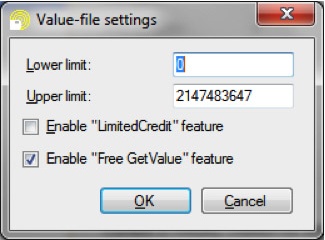
The most common application of a value file is the MAD-3 standard, which requires that application FFFFFF file 01 is a value file that contains the value 3. The above screen shot reflect the settings that the MAD-3 file requires. Especially, the Free GetValue feature needs to be enabled for MAD 3.
An important difference between standard data files and value files is that it is possible to write data to existing standard data files. Any data you map to a value file will only be written if the file is created, and will be neglected if the file already exists on the DESFire chip.
There are three Processing options:
•Create if not found makes sure that the file is created if it does not exist yet, and is normally checked when writing data to newly created applications.
•Change file setting makes it possible to change the file settings after writing the data to it. For value files, this option will normally not be needed, as you cannot write data and you can create the file directly with the correct final file settings. For standard data files, it might be necessary to have the initial file settings less restrictive than the final file settings, for example if the final file settings forbid writing data to the file.
•The DESFire file settings allow for defining a read key, a write key and a read/write key, which might be the same key, but they can also be different. If the read/write key is different from the read or write key, CardExchange will use the read or write key by default for authentication. In rare cases, it might be possible that you need to write to or read from existing applications while only knowing the read/write key. In that case, select the option Use read/write key to ensure that CardExchange Press uses the read/write key.
In the File settings section, you can specify the current or initially created file settings. For new files, CardExchange Press will create the file with these settings. For existing files, CardExchange Press will try to read the file settings from the chip, but if that is not possible, it will assume that the specified current file settings apply.
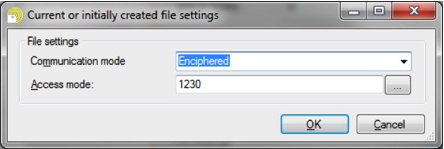
Two file settings need to be defined: the Communication mode and the Access mode. The Communication mode is either Plain, Maced or Enciphered (do not use the option Plain2). Please, refer to the DESFire documentation for more information about this option. Effectively, Plain means that the data in the file is freely accessible, Maced means that the data is not encrypted, but that it is digitally signed and only accessible after a valid authentication. Enciphered means that the data is fully encrypted and that authentication with the correct key is required to decrypt the data.
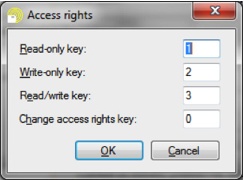
The Access mode defines what functions the application keys have for this file. The first digit specifies the read key, the second digit the write key, the third digit the read/write key and the final digit the change-access-rights key. The digits can be either 0 to D to refer to one of the application keys, E to indicate that the action can be done without authentication (free access), and F to indicate that the action is forbidden (deny access). The button with the three dots allows for setting the access mode in a more intuitive way.
If you selected Change file settings, you also have to specify the Final file settings, which is done in the same way.
Click Next to proceed with the creation of the DESFire Definition and go to the last step of this wizard, Step 6.
