
If you want to store data into the connected database, you need to define Storage Items. Storage Items contain the information of the column name in which you want to save your information like counters or print dates. This Storage Item will be presented in the Storage Items section of the Data tab in the Explorer Menu of the Designer and where they will be connected to the correct Object Type. See Objects and Standard Object Types sections of this Help file for more information.
For the connected database you can define storage items. Just click on the database name on the left side to select and click on Add to define a storage item. You can add unlimited storage items for the connected database.
Storage Items are configured in the last page of the Database Connection Wizard. For more information about the Database Connection Wizard and examples of how to make Database connections, please see the Databases section of this Help file. In this section we will explain all the available functionality of the Storage Items section of the wizard.
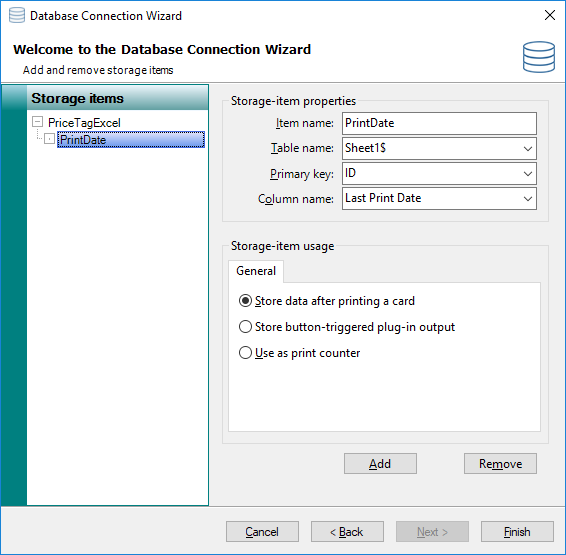
The Storage Items section of the wizard is divided into three different sections which are the Storage items section on the left side showing the connected database and the created storage items, The Storage-item properties group, and the Storage-item usage group.
The Storage-item properties
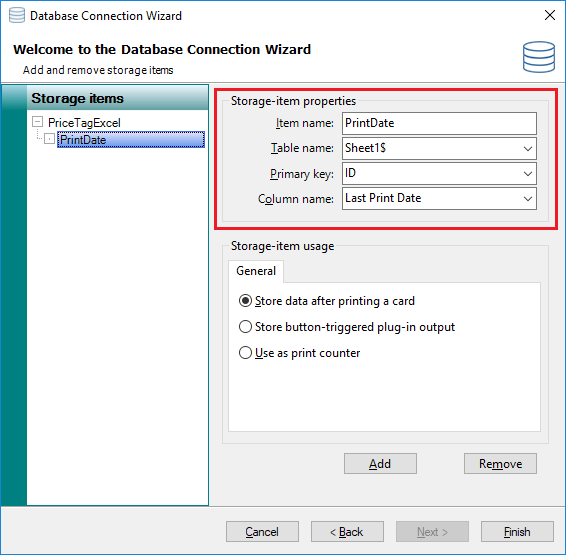
This section, indicated with the red rectangle, shows four important properties:
Storage Item Property |
Description |
Item name |
Enter a name for the storage item like Print Date, for example. |
Table Name |
Select the table from the database where you are storing the data |
Primary Key |
Select the Primary Key from the selected database |
Column Name |
Select the column name from the selected table |
The Storage-item usage
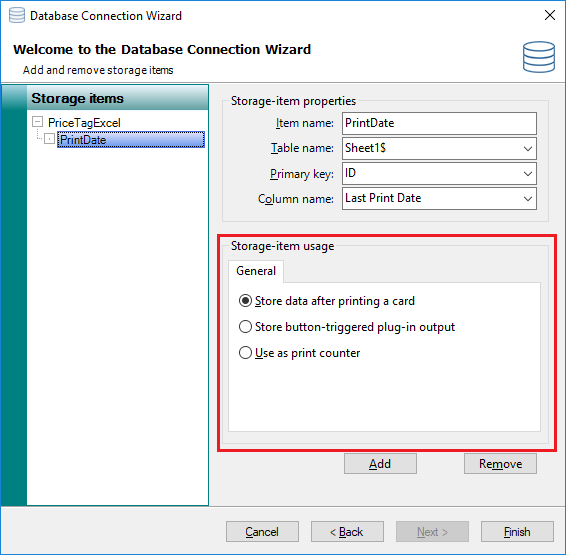
This section, indicated with the red rectangle, shows three options. You can use these options under the General tab to specify the usage of the storage-item so CardExchange® PriceTag knows that it will handle a counter instead of normal columns for example.
The default option is Store data after printing a card, this will store the defined value after the card has printed.
The option Store button-triggered plug-in output is and advanced option and should not be used.
You can also set the option Use as print counter. This will increase the value in the column every time you print a record.
When you click on Finish, you will return to the Designer window.
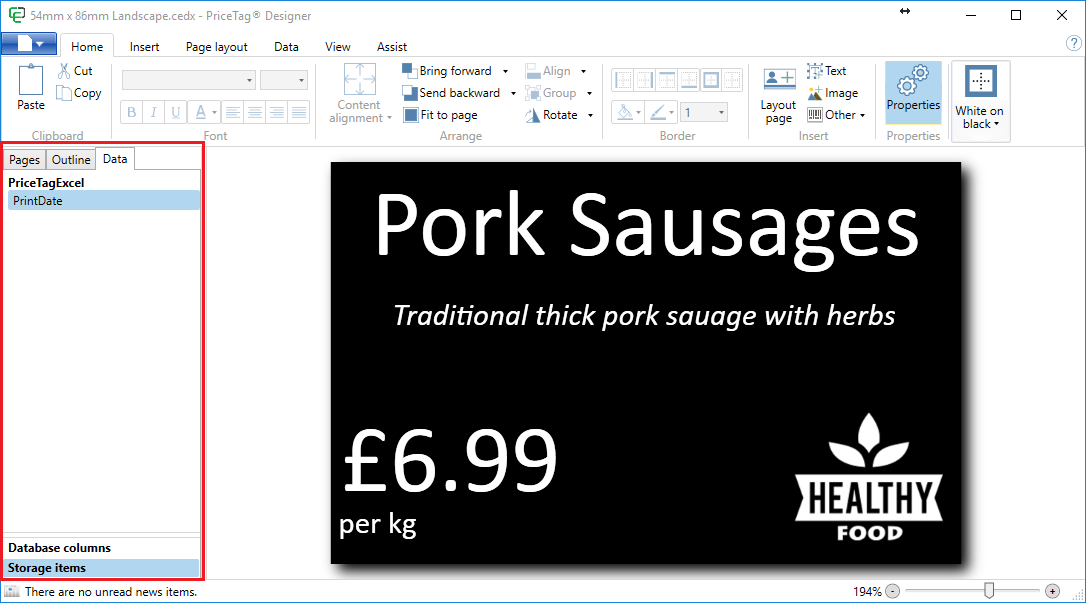
In the Designer Interface you click on the Data tab of the Explorer Menu and now you see the Storage Item tab. Click on this tab and all the created Storage Items will be shown as indicated in the area with the red rectangle. The bold name indicates the connected database and the indent are the created storage items.
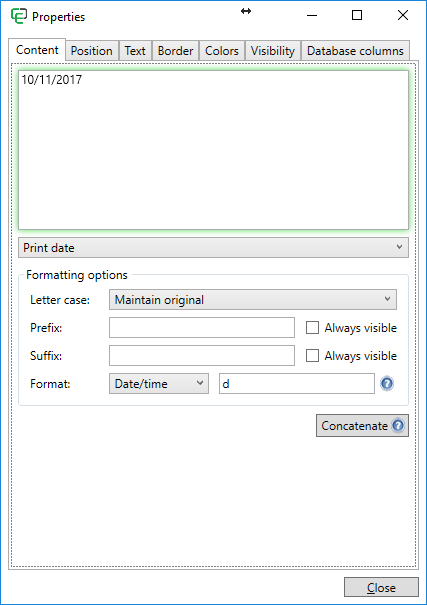
Now make sure that you have the Properties window open and make sure the Content tab is selected. Select one of the Storage Items, in this example we selected the PrintDate item from the Excel spreadsheet.
The Standard option offers you the possibility to connect to any object available and works exactly the same as explained in the section Standard Object Types of this Help file.
If we wanted to store the date that the card was printed, we could select Print date from the Standard Object Type drop down menu. We set the Format option to Date/time and enter the 'd' to make sure we store the short date only and not the time and you are good to go!
