
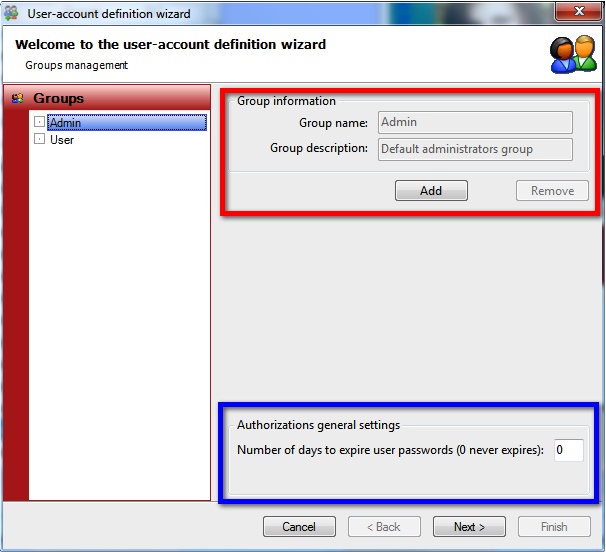
Creating User Authorizations starts with creating and/or managing groups. In this first page of the wizard you find two important areas; The Group information group, indicated with the red rectangle, and the Authorizations general settings, indicated with the blue rectangle. The explorer on the left side shows all the available and created groups.
Important! There are always two groups available; the Admin and the User group. None of these groups can be removed.
With the Authorizations general settings group you can indicate when the passwords need to expire. For example, putting in 30 means that after 30 days all users, when they login, are requested to change their password. When leaving it to 0, passwords will not expire.
In the Group information section you see the Group name and the Group description. It also contains the Add and Remove button. To Add a new group, click on the Add button.
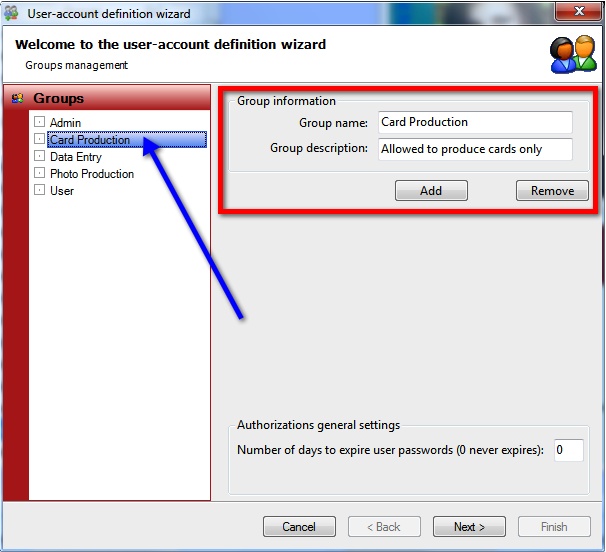
When you have entered Group name, make sure you chose logical names, and entered a Group description, the new created group will appear in the explorer on the left side as indicated with the blue arrow.
In this example we have created groups for card production, data entry, and photo production. There are no limitations on the amount of groups you can create.
If you want to delete a created group, just select the group in the explorer on the left side and click on remove. Confirm with Yes to delete! Deleting a group does not delete your users!
When you are done adding groups you can proceed to the next level of the wizard by clicking Next.
User Management
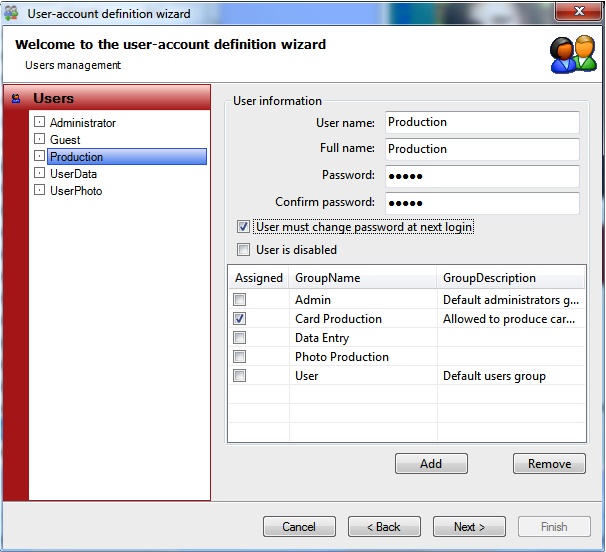
In this page of the wizard you can create new or edit existing users of the system. On the explorer on the left side you can find all the available users, on the right side you can find all the user information.
When you click on Add, to create a new user, you will need to provide a User name, this is the name used to login to CardExchange® Producer, enter a Full name of the user, and enter a Password and Confirm the password.
Just like in the Group Management page of the wizard, we also have two special users; Administrator and Guest. The Guest account can be removed but the Administrator account cannot! What you can change is the password of the Administrator and we advice to do so but keep in mind changing the password means that you need to remember the password. There is no option to retrieve or reset the Administrator password... yet.
The default user name for the Administrator account is Administrator and the Password is Administrator too! For the Guest the password and user name are both Guest. Passwords are case sensitive!
Important! The Administrator has always access to all defined groups and users!
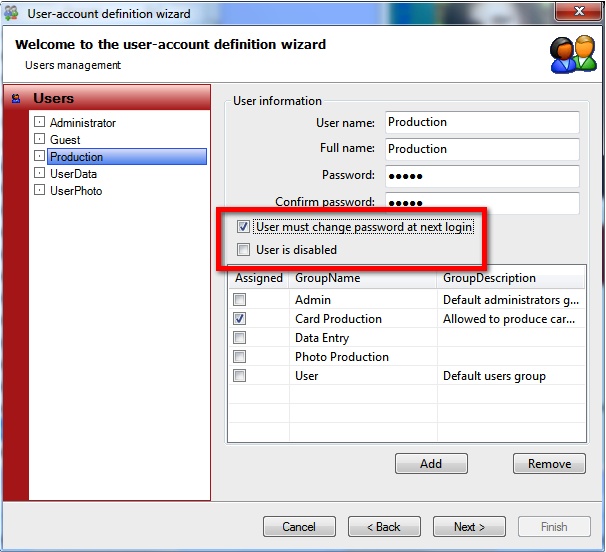
In the area indicated with the red rectangle, you find two special options. If you want the user to generate their own password, just check the box User must change the password at next login. This can be handy if you have a lot of different users to create but you do not want to send out all these different passwords. When you select this option, you can simply use a standard password which first needs to be changed before the user can login to the system. If you have, like in this example, a group account it is better not to use.
Disabling the user is also a handy option. By checking this box, the user cannot login to the system anymore but is not removed from the system. If later the user needs to get access to the system again, simply uncheck the User is disabled box and access is granted again.
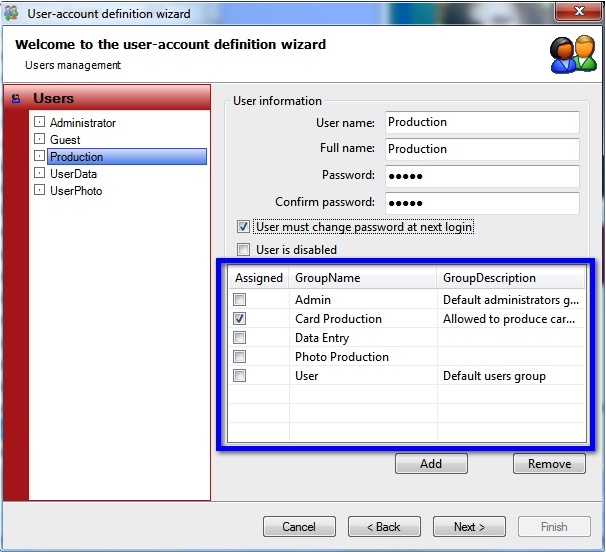
In the section indicated with the blue rectangle you can specify per user to which group it will be assigned. Each user can be assigned to one of multiple groups. In this example, it makes sense that the Production user is assigned to the Card Production group but you can imagine that a some users need to have access to multiple groups.
When you have created or edited all your users of the system and assigned them to the correct groups, you can proceed with the Authorizations management on the next and final page by clicking Next.
Authorizations management
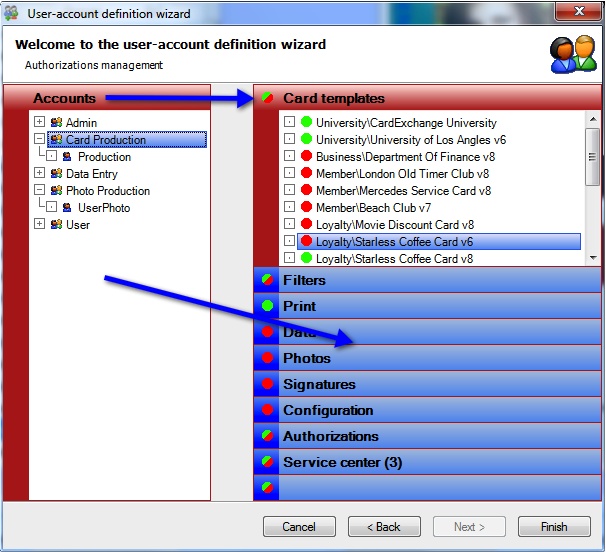
In this last page of the wizard can assign and create the profiles per defined group or specific, per user. In the explorer on the left side you can see all the created groups. If you click on the expand sign  you can see the assigned user of the group.
On the right side, indicated with the blue arrow, you see nine separate tabs dividing the available CardExchange® Producer functionality. When you click on each available tab, the corresponding functionality will be shown. For example, in the select tab, Card templates, all on the system available templates are shown. Each tab and each functionality has an colored indicator. There are basically three options
 No access to functionality
This means that the functionality is not available in the interface. It is not greyed out, it is totally removed.
 Access to functionality
This means that the functionality is available for the user of the system.
 Administrator or selected users and groups only
This means that all the functionality or selections of the functionality is only available for the Administrator.
For example:
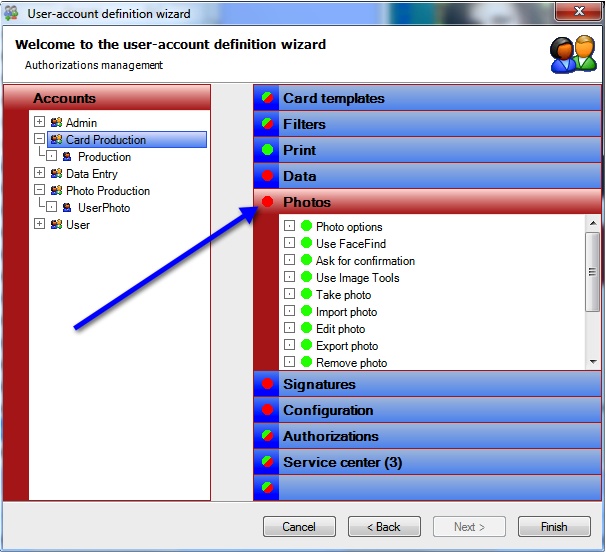
For the group Card Production there is no need to do anything with the Photo functionality, Signatures, Configuration, etc. within CardExchange® Producer. By clicking on the you can completely change the group to no access, even though the specif functionality in the group is indicated with .
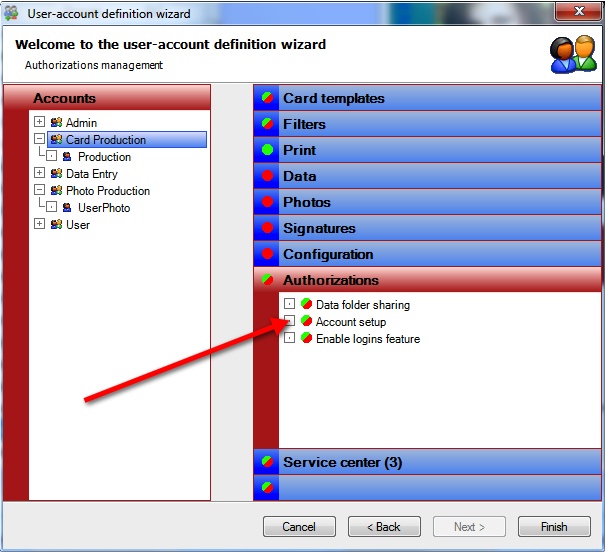
When the functionality is indicated with , only the Administrator will be able to see the functionality. Besides creating the policies for the groups, each separate user can have some different rights besides the group profile. Simple select the user name from the explorer on the left and set the correct authorizations for this user.
When you have defined all the groups, users, and assigned to the functionality allowed for this group and/or user, you can click on Finish to store your account definitions and close this wizard.
