Before documents can be linked to events, they must be imported into the application. To import a document into CardExchange Visitor, head to the Events view -> Configuration tab -> Edit documents.
The “Edit documents” window is brought up. This window is used to import new documents into the application and edit existing documents:
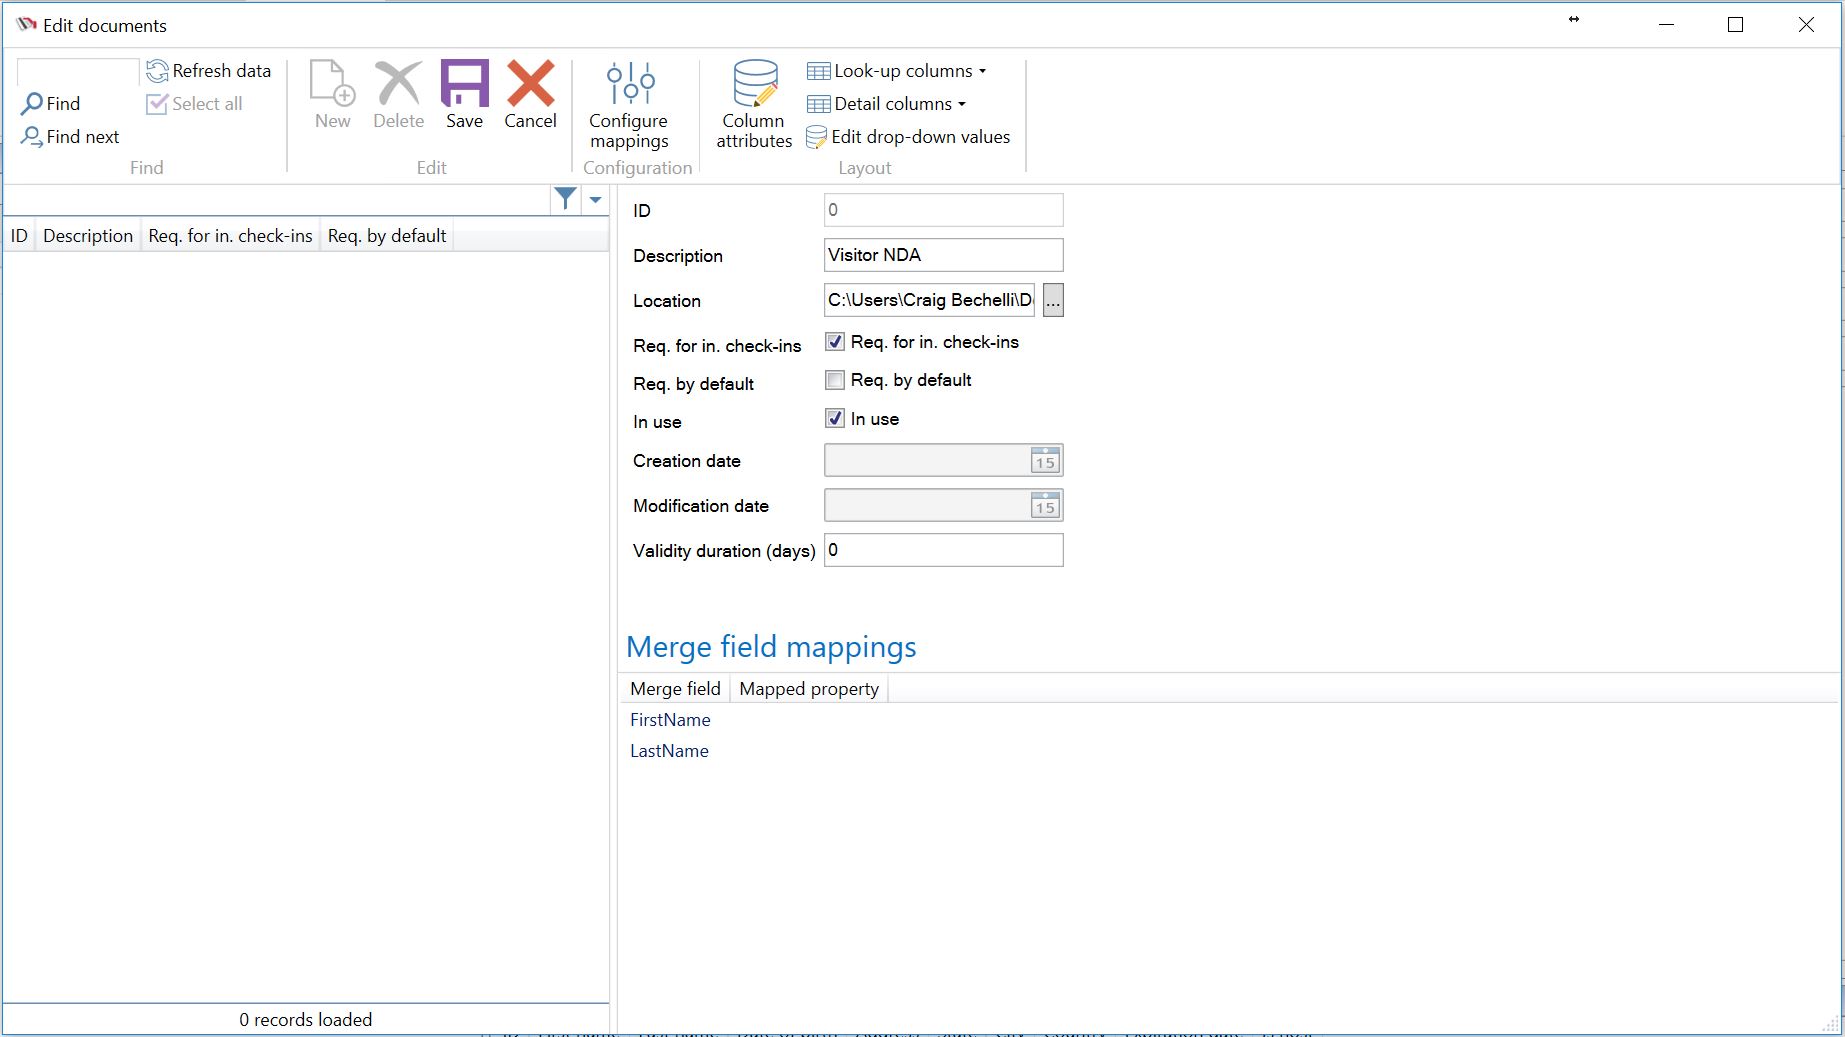
1.To begin importing a new document, click the “New” ribbon button.
2.The Location text box is highlighted red—this is because a document location must be specified.
a.Location is a required field—a new document cannot be added without specifying its location on the computer.
b.Consequently, the “Save” ribbon button is grayed out, signifying that the document cannot be saved without first choosing a file location.
3.The small button to the right of the Location text box brings up the Open file dialog. Locate the desired document on the computer and click “Open." The Location text box now displays the path to the chosen file.
4.If the document selected in the previous step contains merge fields, the “Merge field mappings” area is now populated with the merge field names.
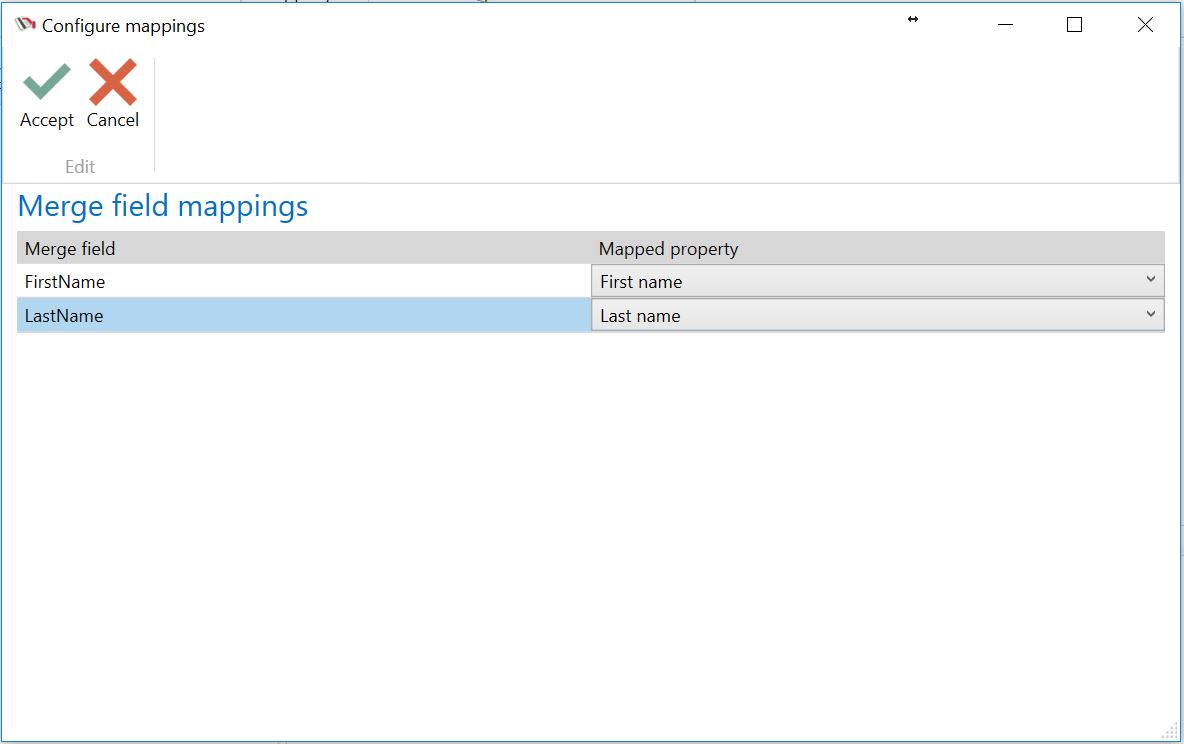
5.Click the “Configure mappings” ribbon button to bring up the configure mappings dialog.
a.For each of the merge fields in the left column, choose the desired mapped person property by selecting it from the corresponding combo box.
b.Click “Accept” to save the current mappings or “Cancel” to discard them. The “Merge field mappings” area in the “Edit documents” window is now updated to reflect the changes.
i.Now when a document is shown during the check-in process, the visitor’s information for each of the chosen properties will be shown in place of the corresponding merge field in the document.
6.Now it is time to configure the rest of the document details:
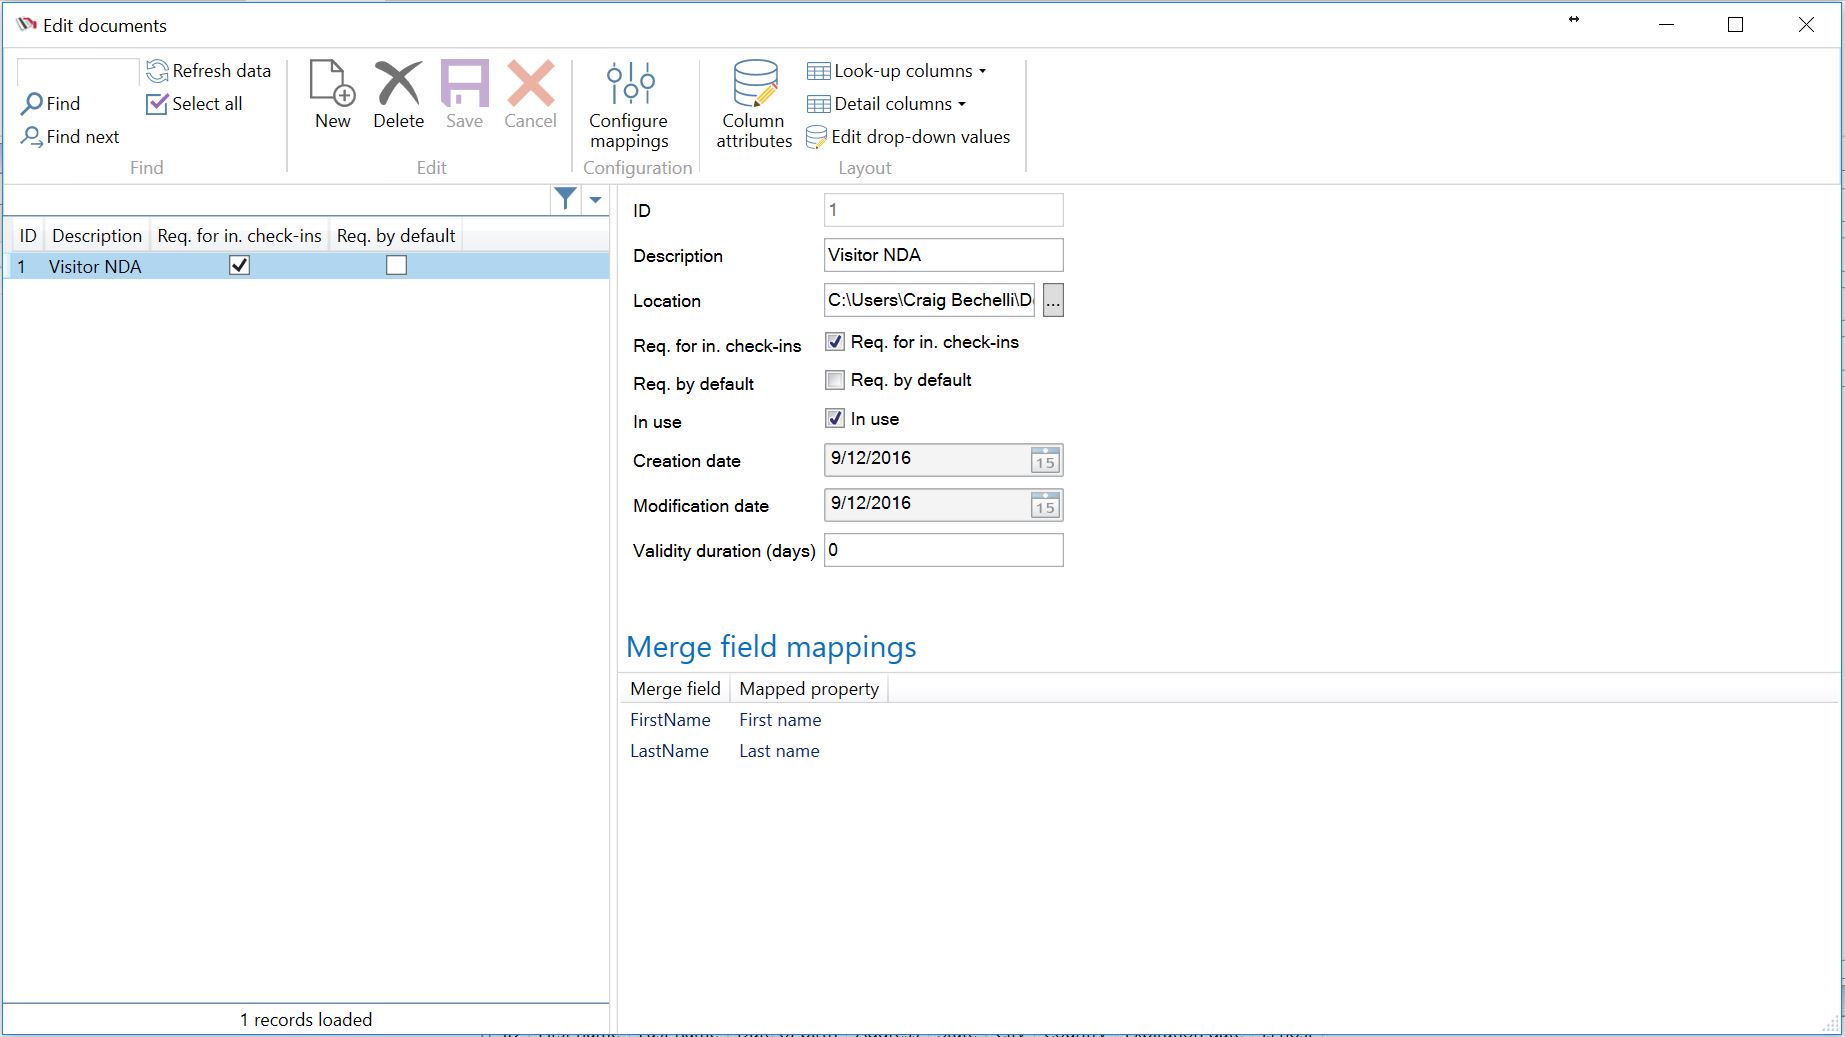
a.Description—this is a short name for the document that will be shown throughout the application (such as when adding documents to events). Enter something here that will allow the document to be easily identified.
b.Required for incidental check-ins—when checked, all visitors checking in without a planned visit will be required to sign this document.
c.Required by default—when checked, this document will automatically be added to all newly-created events, and cannot be removed from events.
d.In use—this box must be checked in order for this document to be accessible throughout the rest of the application. When left unchecked, this document will not show up in the list of available documents during event creation.
This is useful for easily hiding documents that may not be used anymore without having to delete them from the application.
7.Once all of the document details have been configured, click the “Save” ribbon button. The document is added to the list in the left column of the window.
8.If needed, repeat steps 1 – 7 to import more documents. When finished, close the “Edit documents” window by clicking the “X” in the top-right corner of the window.