Although it is not an database, MS Excel is one of the most used files to connect to ID Badging software, and that also goes for CardExchange® Producer. We will demonstrate how to create a connection to an MS Excel file using CardExchange® Producer. You can create a database connection in four easy steps and make the information available for presenting and printing.

Click New to start the Database Connection Wizard.
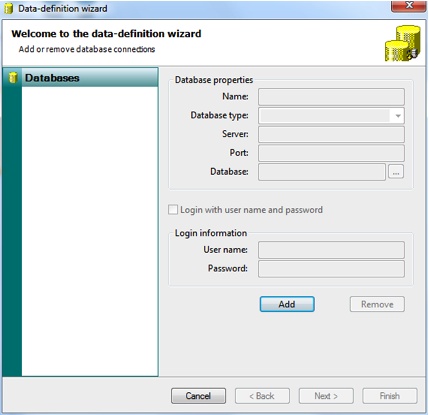
When the wizard opens you click Add to start making the connection.
Step 1
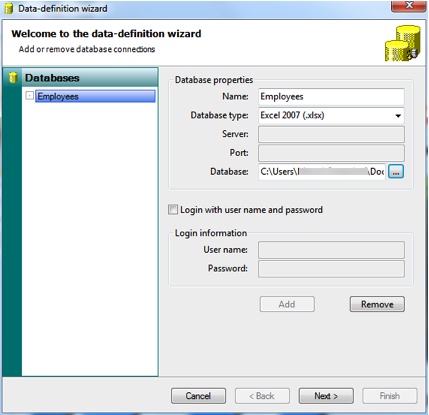
Enter a name for the database connection, select the correct database type, and select the database file by typing the whole pad with extension into the Database text box or click on the  button to browse to the file location. Click Next to proceed. It is important to know that on the moment you click the Next button, the wizard will check the connection with the file or database. If all is correct, the wizard will enter the second page of the wizard. If a problem appears, and database error will be shown.
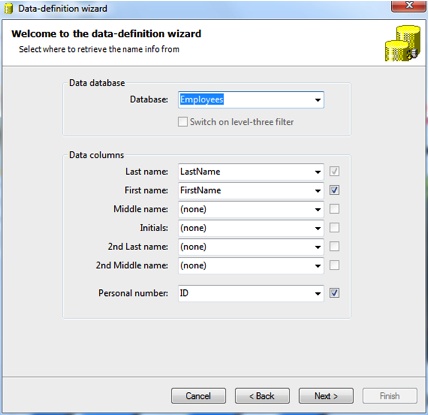
Step 2
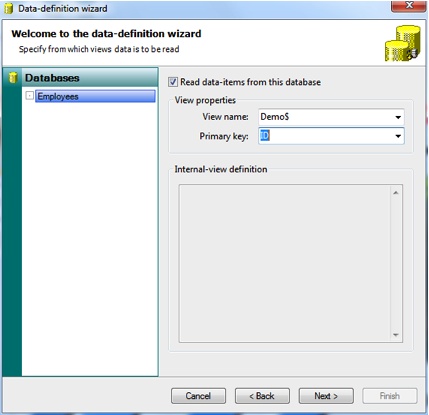
Select the check box 'Read data-items from this database', select the corresponding sheet in the 'View name' drop menu, and select the 'Primary Key' from the drop down menu. The Primary Key is the unique identifier of the record in your database. Click Next to proceed.
Step 3
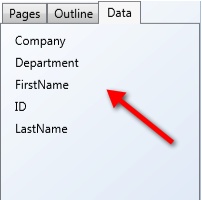
In the Main Interface of CardExchange® Producer you find the Data Record View showing all the records available in the database in a so called data grid. In this page of the wizard we connect the columns of the database to the data fields. The first field always needs to be connected. All other fields are optional. If you connect the database column, left from the drop down menu you see the check box selected. If the check box is checked, the column will be shown in the Data Record View. Click Next to proceed with the last and final step of this Database Connection Wizard.
Step 4
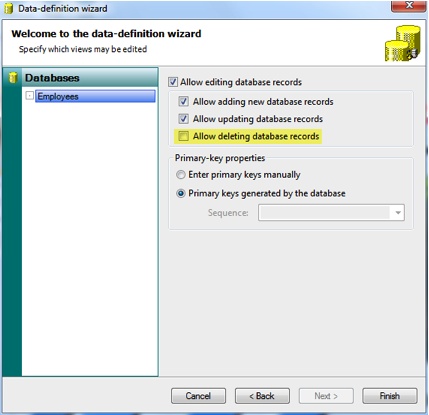
In this page of the wizard you can set the rights to edit the connected database, or in this case, the connected MS Excel file. Click on the check box 'Allow editing of the database records' to enable this functionality. Separate from this selection you can set that the user is allowed to add new records to the database and update existing records. Deleting is deselected because deleting records in an MS Excel file is not supported. In the Primary-key properties section you can select to enter the primary keys manually. If you are not using numbers as primary keys, this check box needs to be selected but for each new record, a unique primary key needs to be entered by the user. We advice to use numbers and leave the check box as is by default, primary keys are generated by the database. Normally real databases support this functionality itself, but because MS Excel is not a database, we have embedded a unique number generator so your primary keys are taken care of by CardExchange® Producer. Now click on Finish
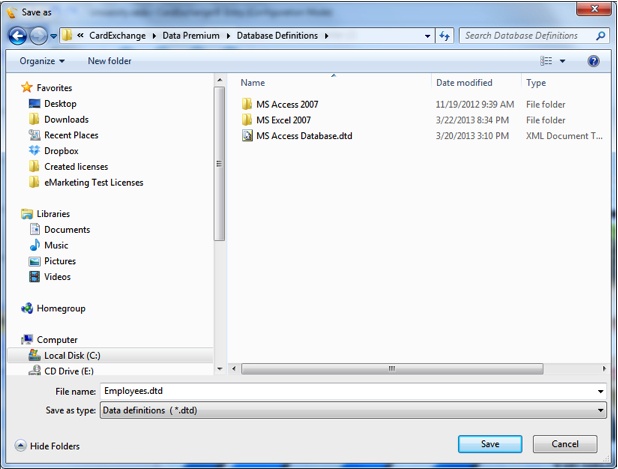
and save your database connection to a location on your computer. We advice to store your data in the Data Folder of CardExchange® Producer.
Now in four simple steps you have created the connection to your MS Excel file and now the columns are available in the Designer for adding to your design.