
When the license has been activated, you can now configure the License Manager. To do so you have to start the WlmAdmin.exe application as explained in the License Manager Tools section of this manual.
Set Preferences
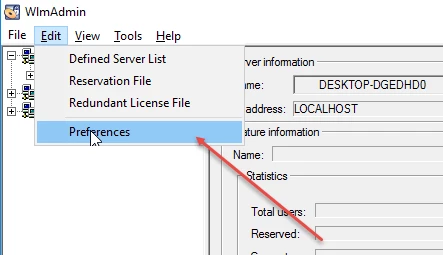
When the application is started we first need to set the Preferences of the license manager. To do so, select Preferences from the Edit menu as shown below:
This will open the Preferences window:
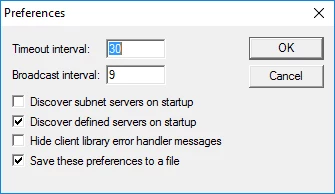
Make sure that you set all the options as shown in the screenshot; Check "Discover defined servers on startup" and "Save these preferences to a file". Click on OK to set the preferences and close the Preferences window.
Create the LOCALHOST server
We need to define the server that is going to hold the licenses. To do so, select Defined Server List from the Edit menu as shown below:

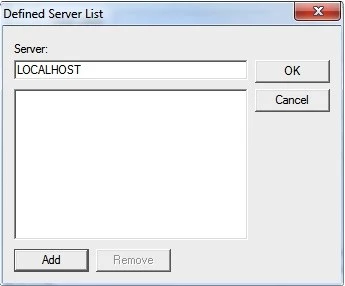
This will open the Defined Server List window. Type "LOCALHOST" (without the qoutes) and click on Add to add the server name and OK to close the Defined Server List window. You will be asked to add the server to the defined list:
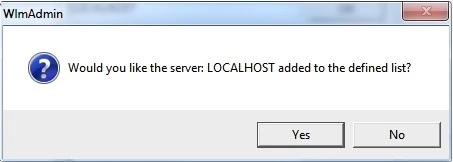
Click Yes to confirm. Your LOCALHOST server will then appear under your Defined Servers list. If you do not see it right away, it may updating and checking for other servers. This process can take up to a minute.

If you do not see your server in the Defined Servers list, check your Preferences and select View → Refresh All
Adding Licenses to the LOCALHOST server
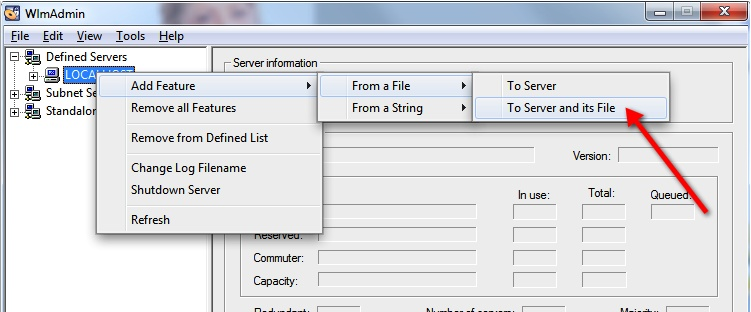
Add the license file to the license manager by right click on the LOCALHOST node in the Defined Servers tree and select Add Feature -> From File -> To Server and its File as shown below:
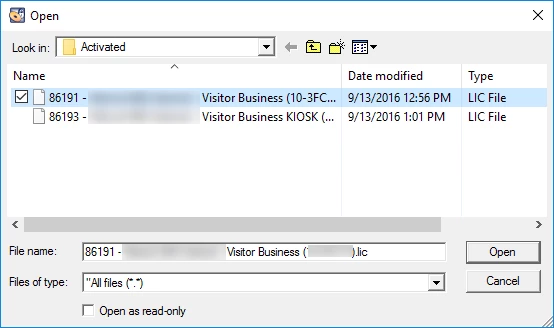
Browse to the location of the downloaded license file with the extension LIC, as shown below:
And click on Open. The licenses will now be installed and if the installation succeeds, the window below will be shown:
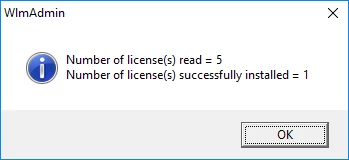
This message box indicates the number of licenses that it was able to read from the license file and the number of licenses that was successfully installed. This number is depending on the amount of client licenses purchased. Click on OK to confirm the installation.
The LOCALHOST node should now have one sub node for each license code as shown below:
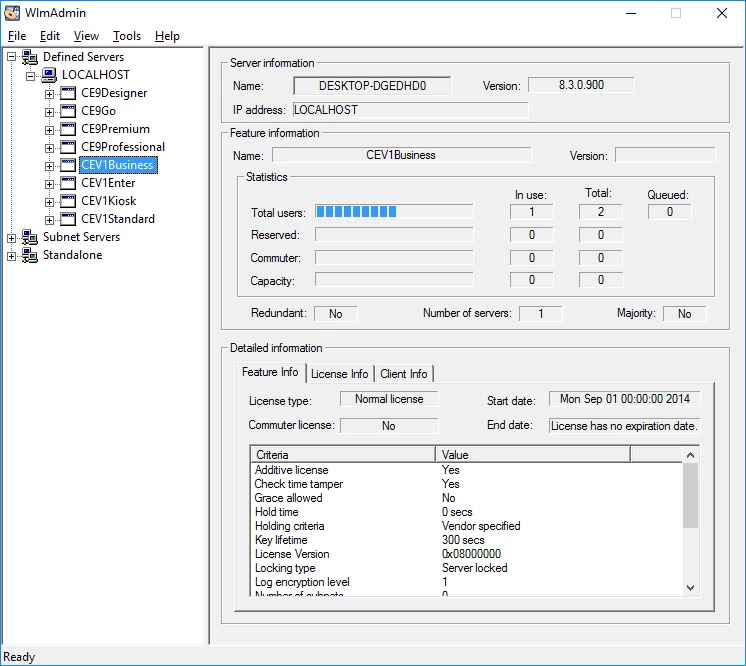
By selecting the license, you can see in the license manager GUI how many licenses are available and how many licenses are in use.
Don't forget, the License Manager is a Windows service and this GUI does not need to be started to have the system working. After you are done with the configuration, you can close this window.
This concludes the installation and configuration of the License Manager and Procedure One. Now we start installing the CardExchange® Producer clients on Desktop computers or on the server.
