CardExchange® Producer offers great functionality to add drop down menus to your Data Edit Window. Using drop down menus limits the user error while entering new or updating existing data.
Drop down menus are supported starting from Premium Edition and higher and in this section we will explain how to configure these drop down menus.
The creation of drop down menus is a part of the Database Connection Wizard.
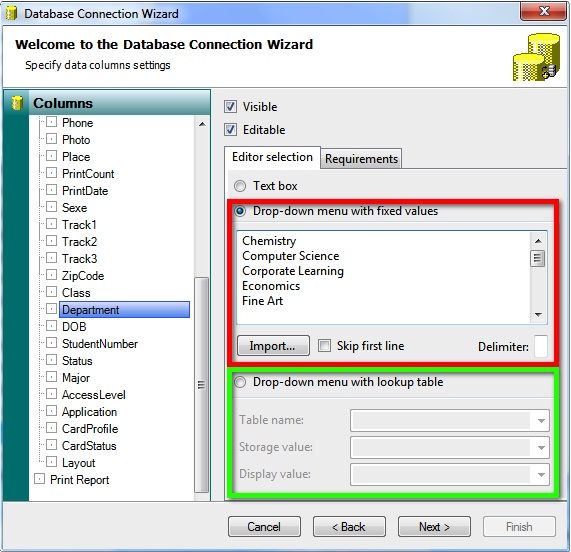
When adding a database and using a Premium or higher edition, on the fifth page of the wizard, where you specify the data column settings, you see a tab called Editor selection. The Requirements tab is only available starting from Professional and higher editions and is described in the Data Requirements section of this Help file.
The Editor selection contains two different ways to create drop down menus. The first option is creating a menu based on fixed values indicated with a red rectangle. The second option is creating a drop down menu using a look-up table from the connected database as indicated with a green rectangle.
Creating Drop Down Menus with Fixed Values
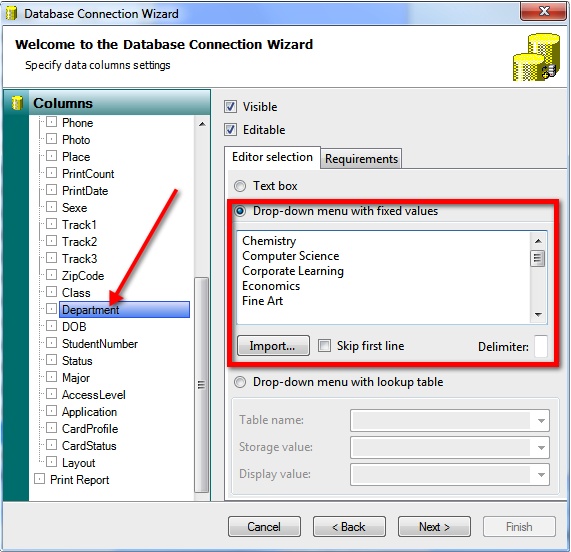
To create a drop down menu with fixed values, you first select the column from Columns Explorer on the left side as indicated with the red arrow and select the Drop-down menu with fixed value option from the Editor selection tab. The text box becomes available and you can simply add items for the drop down menu by entering them as text as shown in the screenshot above.
It is also possible to import a CSV file containing the items for the drop down menu. To do so, click on the Import button and browse to the file.
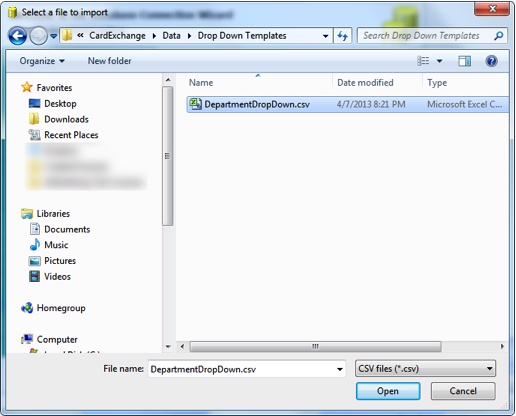
And click on Open to select the file for Import.

When the file is imported, the information of the file is shown in the text box indicated with the red rectangle. If the file contains a header, make sure the Skip first line is selected to make sure that it is not going to be a part of the drop down menu items, and select the Delimiter used for the the file, in this case a comma, as indicated with the red arrow.
Creating Drop Down Menus with Look Up Table
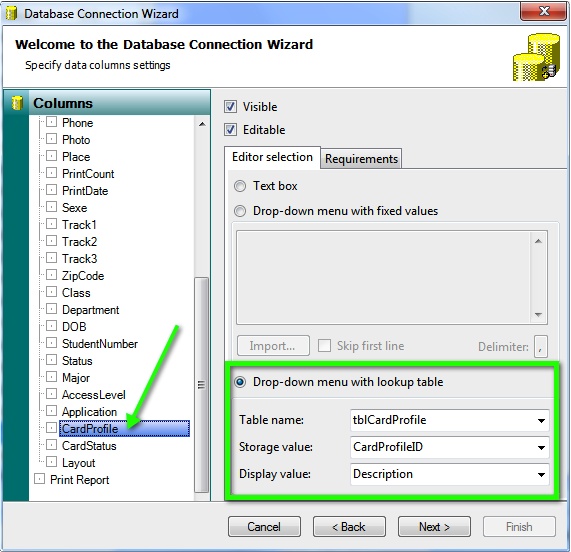
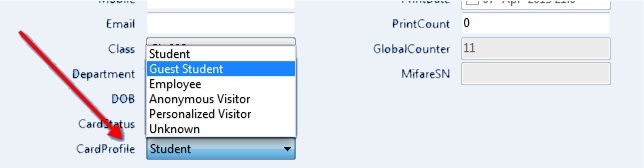
To create a drop down menu using a Look Up Table, you first select the column from Columns Explorer on the left side as indicated with the green arrow and select the Drop-down menu with lookup table option from the Editor selection tab. Now you see that three drop down menus become available. From the drop down menu of the Table name field you select the table that is containing the Look Up data. In this example we are using a table named tblCardProfile, which is shown below:
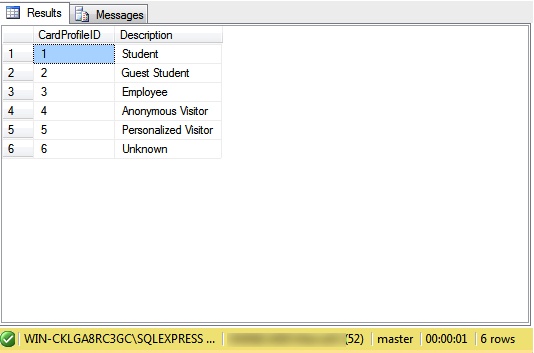
In the table content we see a CardProfileID and a Description. We would like to store the CardProfileID into the database when inserting and/or updating so we select from the Storage value drop down menu, CardProfileID. Because a number does not make any sense for a operator of the system, we would like to present the information from the Description column to the operator, therefore we select Description from the Display value drop down menu.