

If you want to store data into the connected database(s), you need to define Storage Items. Storage Items contains the information of the column name in which you want to save your information like photos or print dates. This Storage Items will be presented in the Storage Items section of the Data tab in the Explorer Menu of the Designer and where they will be connect to the right Object Type. See Objects and Standard Object Types sections of this Help file for more information.
For each connected database you can define storage items. Just click on the database name on the left side to select and click on Add to define a storage item. You can add unlimited storage items for each connected database.
Storage Items are supported starting from Premium and Higher Editions and are configured in the last page of the Database Connection Wizard. For more information about the Database Connection Wizard and examples of how to make Database connections, please see the Databases section of this Help file. In this section we will explain all the available functionality of the Storage Items section of the wizard.
The Storage Items section of the wizard is divided into three different sections which are the Available Storage Items section on the left side showing all the available databases and their created storage items, The Storage Items Properties group, and the Value Properties group.
The Storage Item Properties
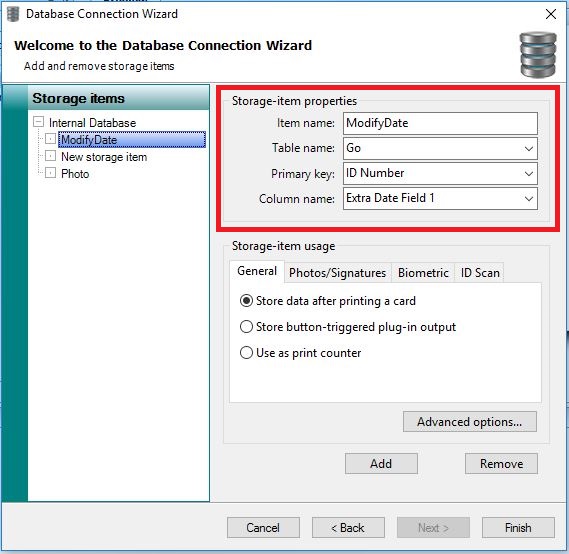
This section, indicated with the red rectangle, shows four important properties:
Storage Item Property |
Description |
Item name |
Enter a name for the storage item like Photo, Print Date, etc. |
Table Name |
Select the table from the database where you are storing the data |
Primary Key |
Select the Primary Key from the selected database |
Column Name |
Select the column name from the selected table |
CardExchange® Producer not only offers storing data into multiple connected databases, you can also store data in multiple tables. That makes this section so powerful. For example, you are connected to a database containing a view that combines two tables, for example Student and Student Photo, with a so called LEFT INNER JOIN connection. A LEFT INNER JOIN view shows all the records of the Student table with the photos of the Student Photo table. Even if there is no photo for the Student available in the Student Photo table, the Student record will be shown.
Everybody knows that you cannot store data into the database via an LEFT INNER JOIN view because updating one record will update all records and therefore, in most of the competitive applications you simply cannot store information back into the database when connecting to a view like this.
With CardExchange® Producer you select directly the Table, Primary Key, and Column Name. In this example we would select the Table 'Student Photo', the Primary Key 'StudentID', and the Column 'StudentPhoto'. Now when we store the photo, it will be stored directly into the correct column out passing the connected view.
The Value Properties
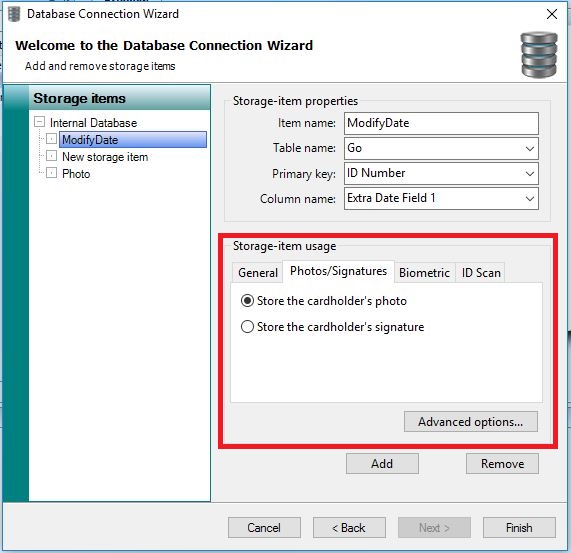
This section, indicated with the red rectangle, shows three properties. You can Supply for a new value for the selected column which means that the data will always be added to the table and will not only update the record. You can use the options under the tabs to specify the usage of the storage-item (like photos) so CardExchange® Producer knows that it will handle images instead of normal columns.
This is a very important setting because Storage Items are normally processed on the moment that the card is produced. Of course, when taking photos or capturing signatures, you would prefer to store the image directly and not at the end of the print process. When selecting this option, the Storage Item will be processed immediately.
You can also set the option Use selected column as counter. This will increase the column every time you print a record.
Besides these properties you can also set some advanced properties for the Primary key and Insert/update commands. Clicking on Advanced options will open the window below.
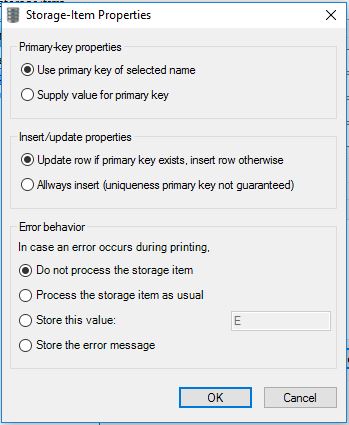
In the Advanced Storage Item Properties window you find three different groups that you can set. First group is the Primary Key Properties group. By default the system uses the Primary Key of the selected record for storing into the database. But it is also possible to supply the value for the Primary Key.
In the Insert/Update Properties group by default the row is always updated when the Primary Key exist. It will insert if not. You can also select to Always insert. That can be handy if, for example, the amount of prints needs to be reported with date and time. Be aware that the uniqueness of the Primary Key will not be guaranteed anymore.
In the last group you can set the Error behavior of the Storage Item. By default, the Storage item will not be processed but you also select one of the other options like process as usual, store a predefined value, or store the error message. Of course, in case of the last two choices it is important to make sure the database column can hold this type of content. Click on OK to return to the Wizard Page.
When you have created all your Storage Items, the Wizard page should like something as shown below:
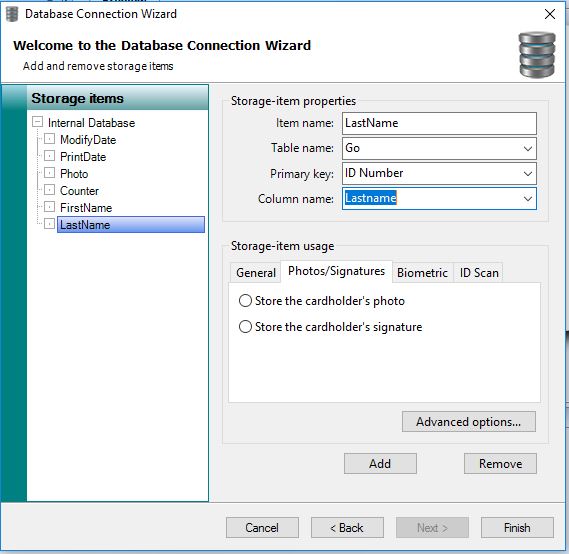
When you click on Finish, you will return to the Designer window.
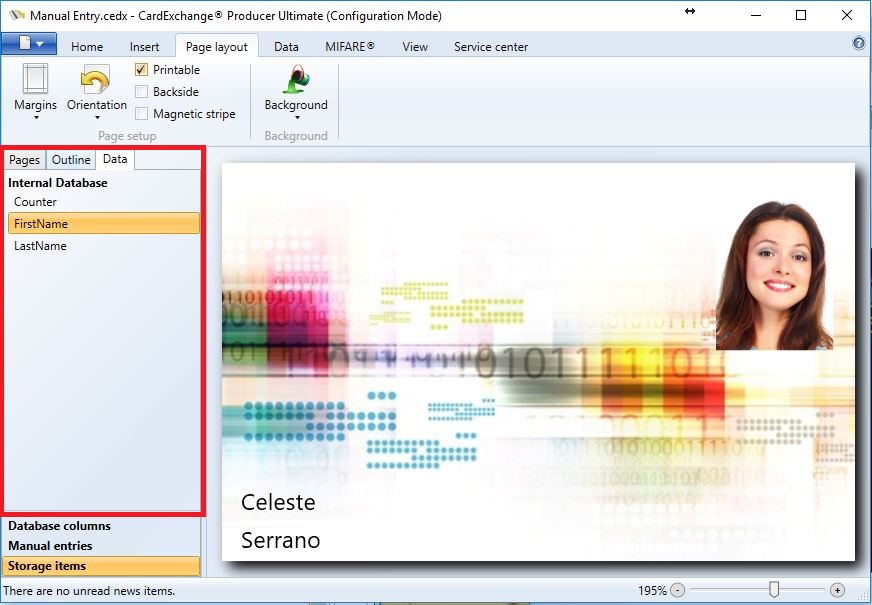
In the Designer Interface you click on the Data tab of the Explorer Menu and now you see the Storage Item tab. Click on this tab and all the created Storage Items will be shown as indicated in the area with the red rectangle. The bold name indicates the connected database and the indent are the created storage items.
Now make sure that you have the Properties window open and make sure the Content tab is selected. Select one of the Storage Items, in this example we selected the FirstName item from the Internal database.
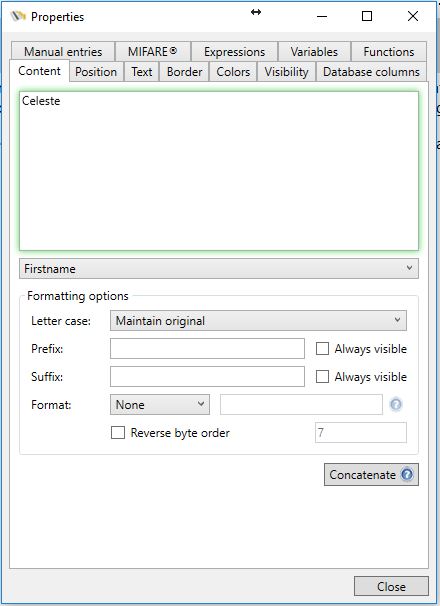
The Standard option offers you the possibility to connect to any object available and works exactly the same as explained in the section Standard Object Types of this Help file. For example we want to store the FirstName into another database so we select FirstName from the list of database columns for the Storage Item selection we created.

If we wanted to store the date that the card was printed, we could select Print date from the Standard Object Type drop down menu. We set the Format option to Date/time and enter the 'd' to make sure we store the short date only and not the time and you are good to go!
Note: When the Photo Storage Item is selected in the database setup, you will not see these options under the tab in the designer.
The same applies for Signatures, Biometric data, ID Scan and Counters
