

Magnetic encoding with CardExchange® Producer is very easy to configure. Just check the Magnetic stripe check box in the Page layout tab or select Page Setup from the Menu.
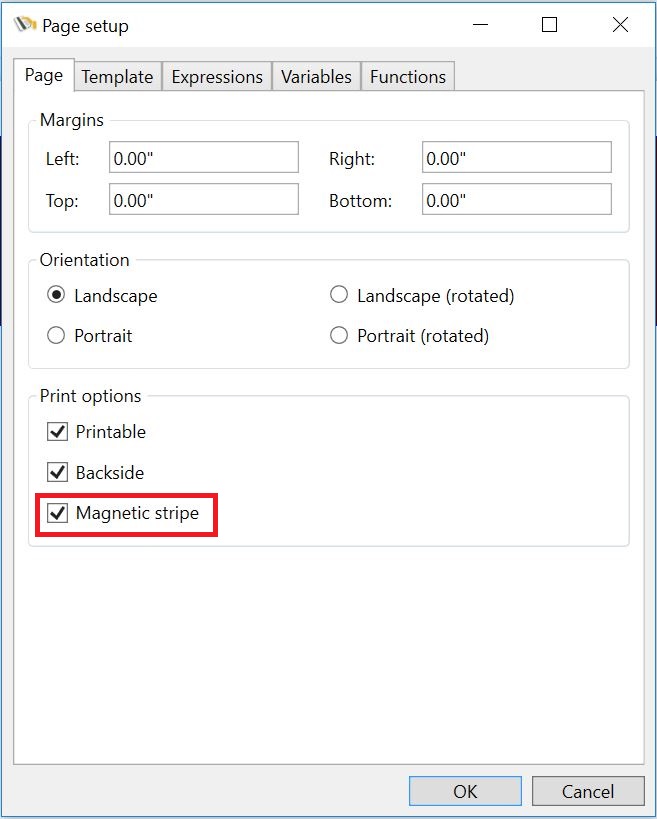
Select the Page and check the Magnetic stripe check box.
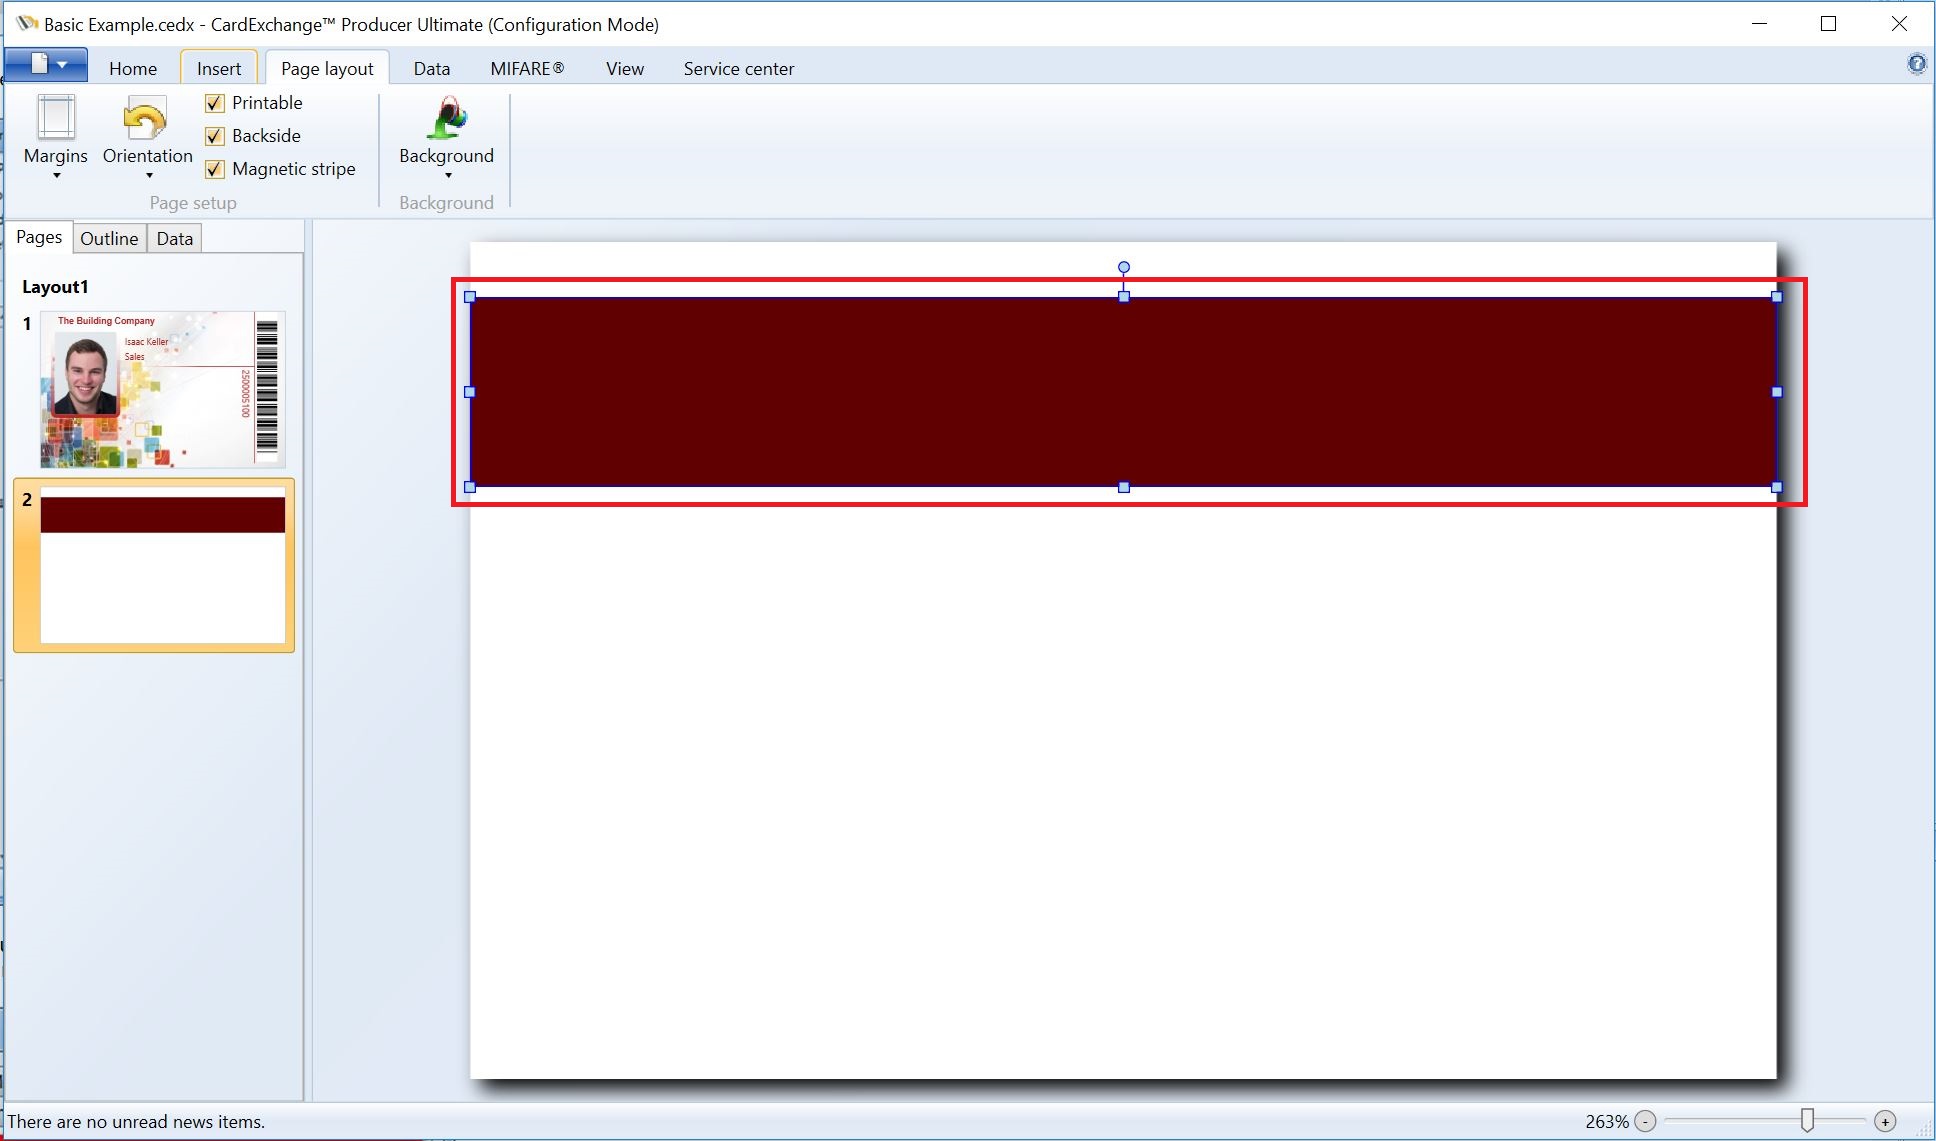
In the Page design you now see a red magnetic stripe rectangle appearing as indicated with the red rectangle. Now make sure that you have the Properties window open and make sure the Content tab is selected and that the magnetic area on your page design is selected.
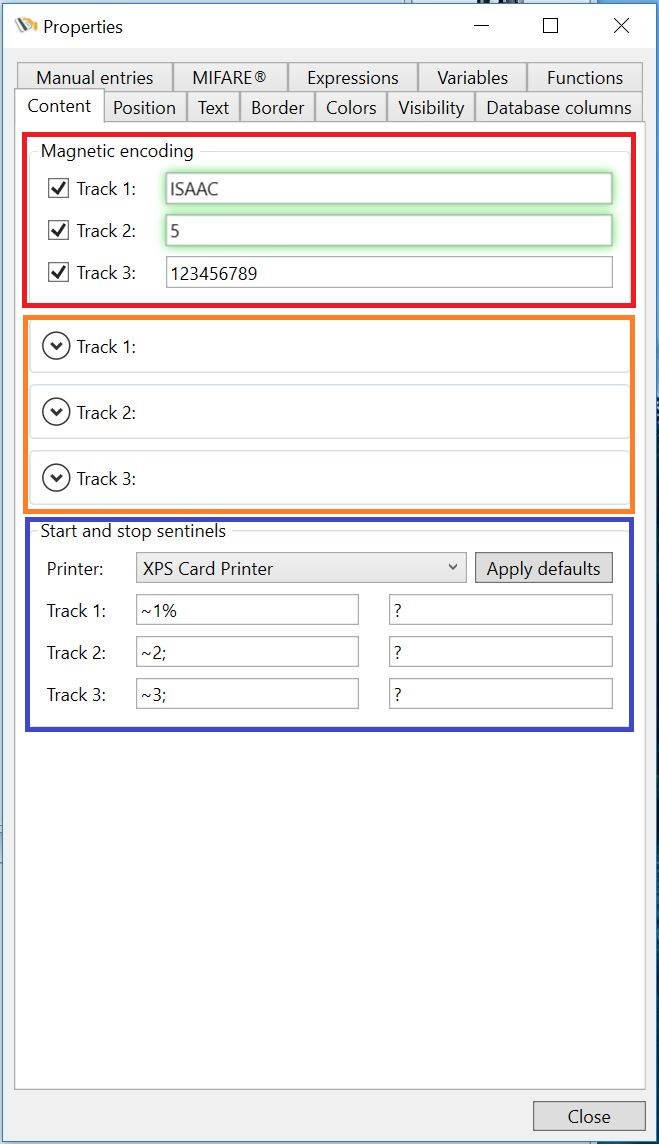
In the Properties window you now see three sections:
•Magnetic encoding
•Track 1, Track 2, and Track 3
•Start and stop sentinels
Magnetic encoding
In this group, indicated with the red rectangle, you select which track you want to write to. Just select the check box for each track to make it available. In the text box next to the Track you can directly enter information (fixed value) or drag a database column into it. For each selected track the track object, indicated in the orange rectangle, will become available.
Track 1, Track 2, and Track 3
In this group, indicated with the orange rectangle you can set or change the information that is being coded to the magnetic stripe. Click on the  to expand the Track info.

Just like with normal objects, with the Magnetic Encoding you can also use the Standard Object Types to connect.
Start and stop sentinels

All ID Card Printers are using start and stop sentinels for moving the card into encoding position. Although encoding of magnetic cards is based on an ISO standard, the commands used are mostly different per manufacturers brand.
To make sure you are using the correct start and stop commands, the most common commands are available via CardExchange® Producer directly. Just select the printer you are using from the printer drop down menu and click on Apply defaults.
If you are using specific start and stop sentinels, you can directly enter them into the text boxes.
